
SurgiSim Help Center / Beta version 1.0
Introduction
- Software Version: SurgiSim beta v 1.0
- University of Calgary, Western University and Stanford University
- Last Update: June 1st 2021
This guide provides detailed instructions to perform several tasks when using SurgiSim.
SurgiSim beta v1 Release NotesCurrent features
- Load specimens (volumes and segmentations);
- Perform dissection/drilling with haptic feedback;
- Evaluate temporal bone dissections with an end-product assessment tool;
- Take screenshots of your dissection;
- Virtual Reality (VR) and monitor based (2D) modes;
- Currently supported HMDs: Oculus Rift CV1, Rift S, Quest and Quest 2;
- Use a virtual microscope for dissections.
Coming soon
- Create new .xml files using DICOMS and segmentations;
- Download files from an online database;
- Record videos;
- File Architecture improvements:
- Search for files;
- Create new folders;
- Sort files by most recent or by name;
- View files as icons or list;
- Creating transfer functions using the appearance editor;
- Enhancing the virtual operative experience with virtual equipment additions (PACS station);
- Improved visual textures and materials;
- Interact with numerous standardized VR specimens (fbx/obj photogrammetry files);
- Improved hand animations with additional poses (e.g. finger pointing, hand grabbing, etc.);
- Support for more HMDs such as the HTC Vive, Valve Index, etc.
Frequently Asked Questions
What is SurgiSim?
SurgiSim is a virtual reality (VR) surgical simulator designed as a collaborative effort between the University of Calgary, Stanford University and Western University. The platform supports the exploration and manipulation of patient-specific anatomy derived from clinical imaging studies. SurgiSim allows skull base surgeons and trainees alike to rehearse complex procedures using high-fidelity stereoscopic graphics and haptic feedback.
With SurgiSim, a user creates surgical scenes in which anatomic structures are derived from segmented clinical PACS systems. Volumetric structures may be represented with predefined or customized material properties and viewed with a variety of stereoscopic displays using real-time volumetric rendering. Virtual dissections can be performed with the support of high-fidelity haptic feedback from a variety of supported hardware. The dissections can be compared with intraoperative video for retrospective analysis.
If you don't have a haptic device or a VR headset, you can still use SurgiSim as a specimen viewer. You have three options when using SurgiSim: 1) PC only; 2) PC with a VR headset or a haptic device; or 3) PC with a VR headset and haptic device.
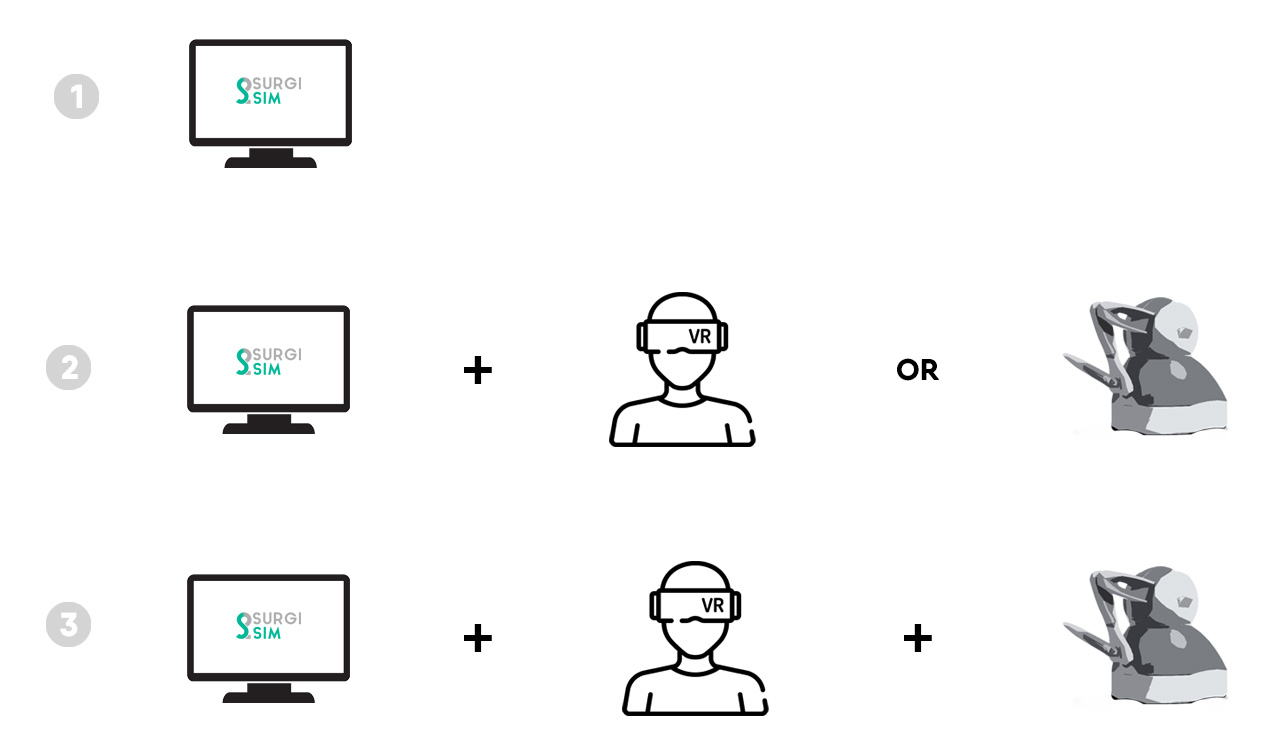
Options when using SurgiSim.
What hardware do I need?
SurgiSim is designed to run on standard commercial-grade hardware and software.
Hardware:
- Processor: intel(r) Core™ i7 6700k or better
- RAM: 16GB
- GPU: NVIDIA GeForce RTX 3070
- Displays: Oculus Rift S or Oculus Quest 2
- Haptic device: Geomagic Touch Haptic (20% Education discount available at www.rapid3d.ca) * **
* A haptic hand controller is required to simulate drilling.
** SurgiSim can be used with a variety of commercially-available haptic interfaces including the Geomagic Touch/Sensable Omni by Geomagic and the Omega.6 by Force Dimension.
How do I set up the haptic device?
What software/drivers do I need?
- V3.5 Touch Device Driver v2020.7.9 (for Ethernet Touch or Touch X, and USB Touch or Touch X devices).
- Following installation of the drivers, there will be two programs available: Geomagic Touch Setup and Diagnostics.
How do I install SurgiSim?
- Download the installer package here. Make sure you have entered your email before downloading the installer. If your download doesn't start within seconds, click restart the download. In the event you do not have this, please contact us at: info@surgisim.ca.
- Look for the app in your Downloads folder and double-click it.
- Continue through the installation steps.
- Start SurgiSim!
See a more detailed explanation in Getting Started
How do I get started?
See Getting Started
How do I load specimens?
How do I interact with the specimens?
Monitor Mode (2D)
Using your mouse, you can interact with the specimen through rotation (left click) and translation (right click). Use the wheel to zoom in and zoom out.
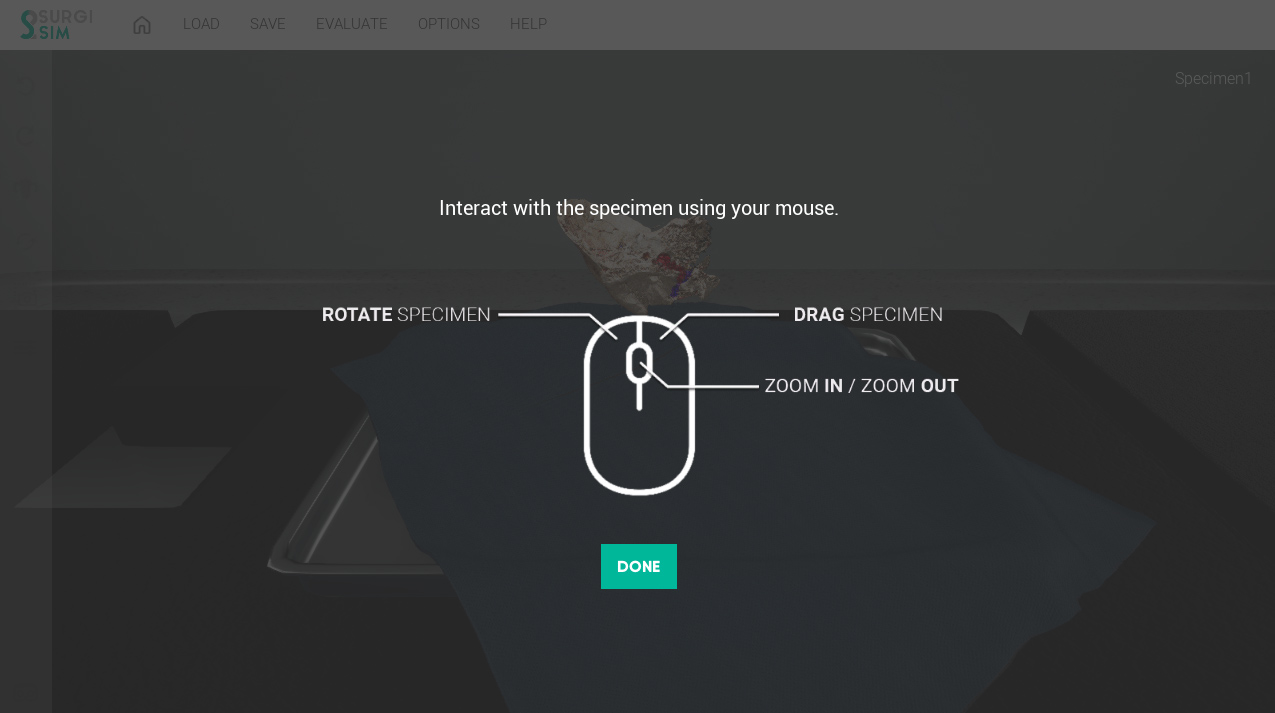
Mouse instructions.
Virtual Reality (VR) Mode
Using your Oculus touch controllers, you can grab the specimen directly and place it in any desired location.
Use the grab button to move and rotate the specimen in VR:
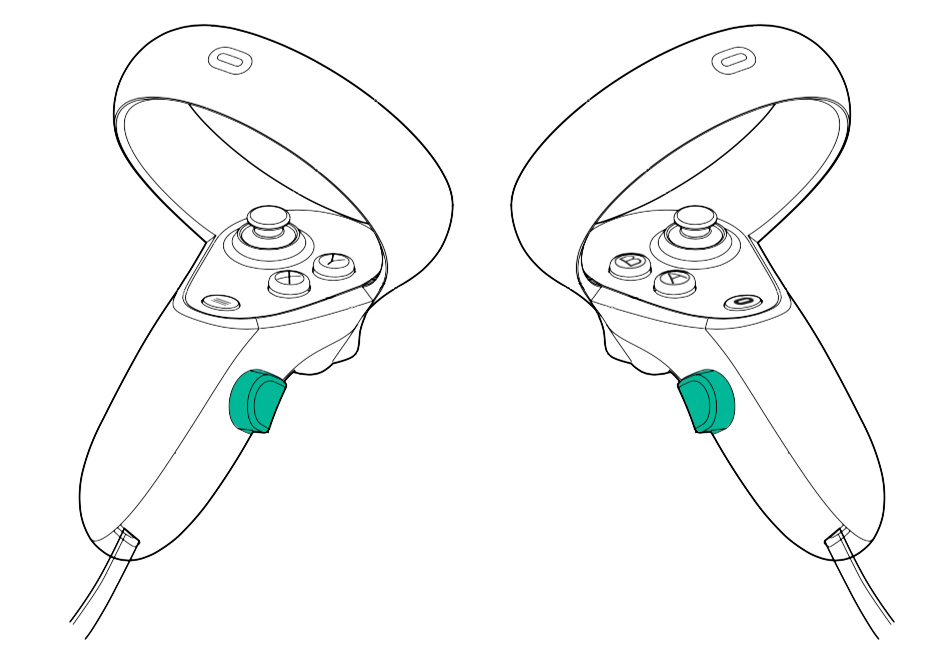
Grab button in Oculus Touch Controllers.
2D Workspace
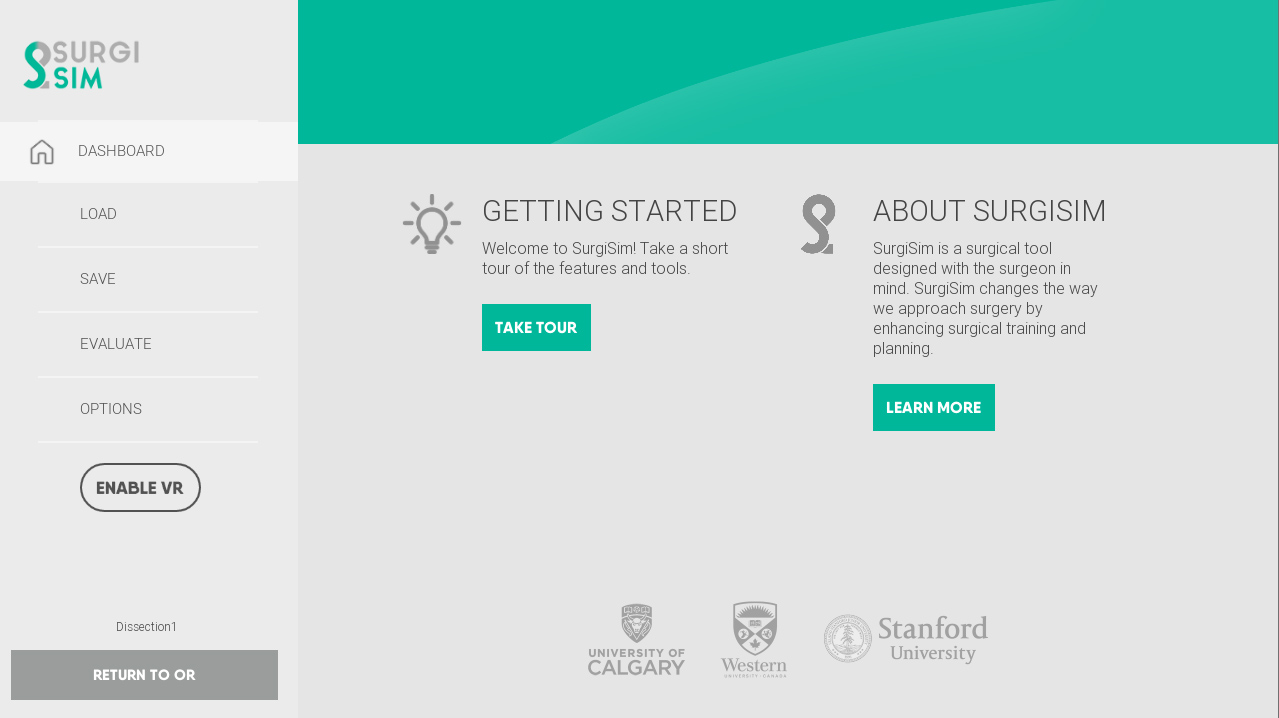
Use the toolbox on the left to undo, redo, reset your workspace/specimen, enable Virtual Reality mode and other things. Use the top bar menu to load, save, and evaluate dissections. Click help if you ever need it!
2d Workspace
Which file types can I upload?
Use your local hospital-specific DICOM imaging viewer to locate a patient case. Choose a computed tomography (CT) temporal bone protocol with or without contrast. Within this protocol, select a series with slices that are at most 0.625 mm thick. Download the series into a folder on your computer that you can easily find. This folder will contain all of the slices in that particular series and this folder will subsequently be uploaded into SurgiSim *.
* This feature is currently in development.
Getting Started
- Download the installer package here. Make sure you have entered your email before downloading the installer. In the event you do not have this, please contact us at: info@surgisim.ca.
- Look for the app in your Downloads folder and double-click it.
- Continue through the installation steps.
- If you are using a haptic device, ensure it is powered on and connected to the computer.
- Locate the SurgiSim application in your Program Files folder, Windows Start menu or desktop. Double click on the SurgiSim application.
- Start SurgiSim.
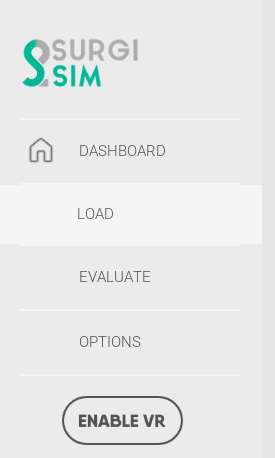
- Use the menu on the left to load new specimens, save dissections, and evaluate your dissections.
- Make sure to complete the on-screen tour.
SurgiSim setup icon
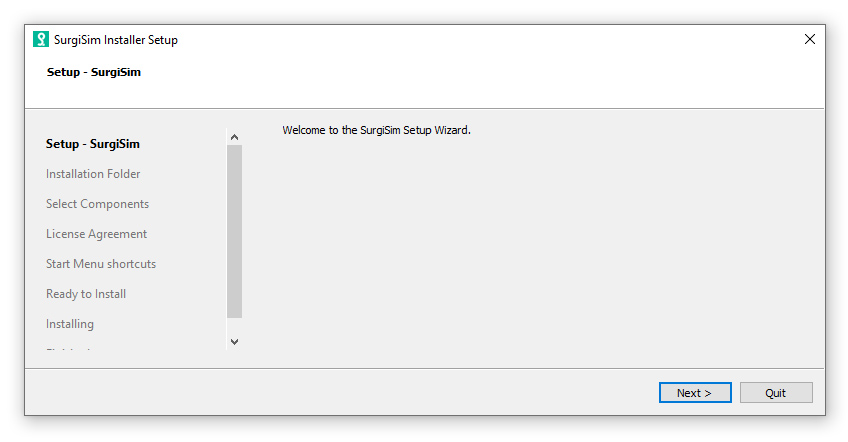
SurgiSim Installer steps

SurgiSim App in the Windows Start Menu
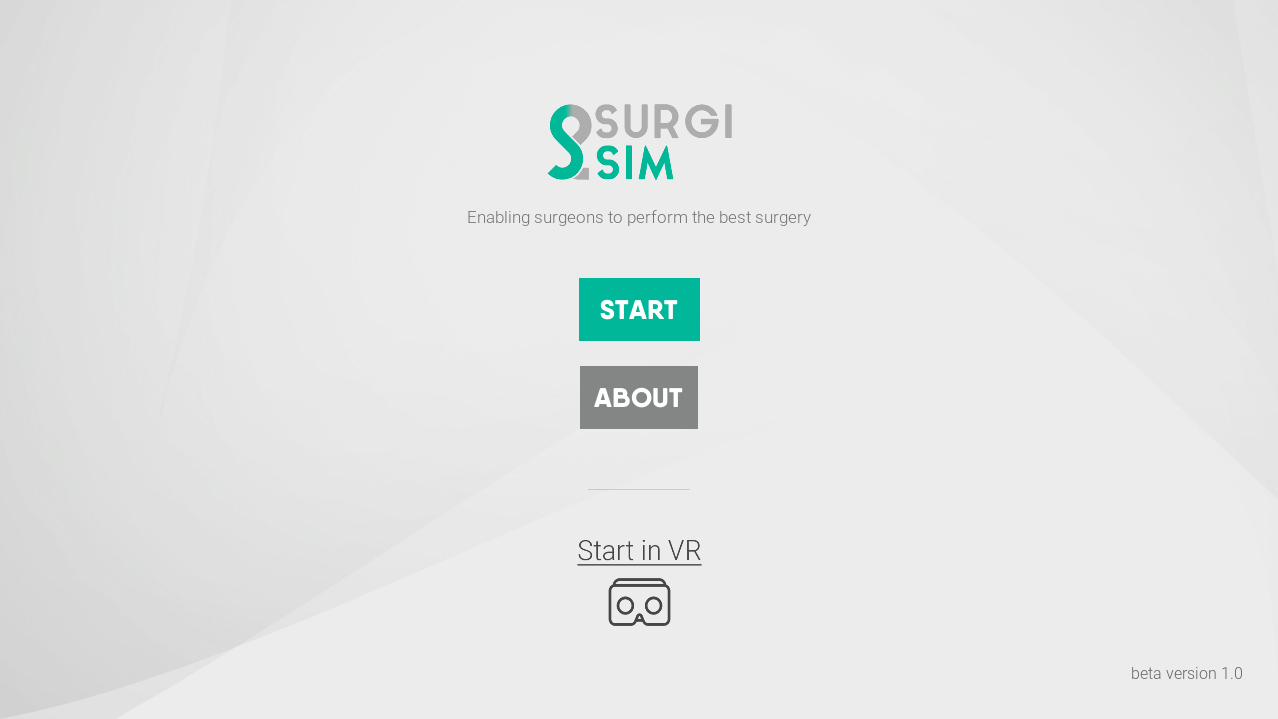
SurgiSim Home Page
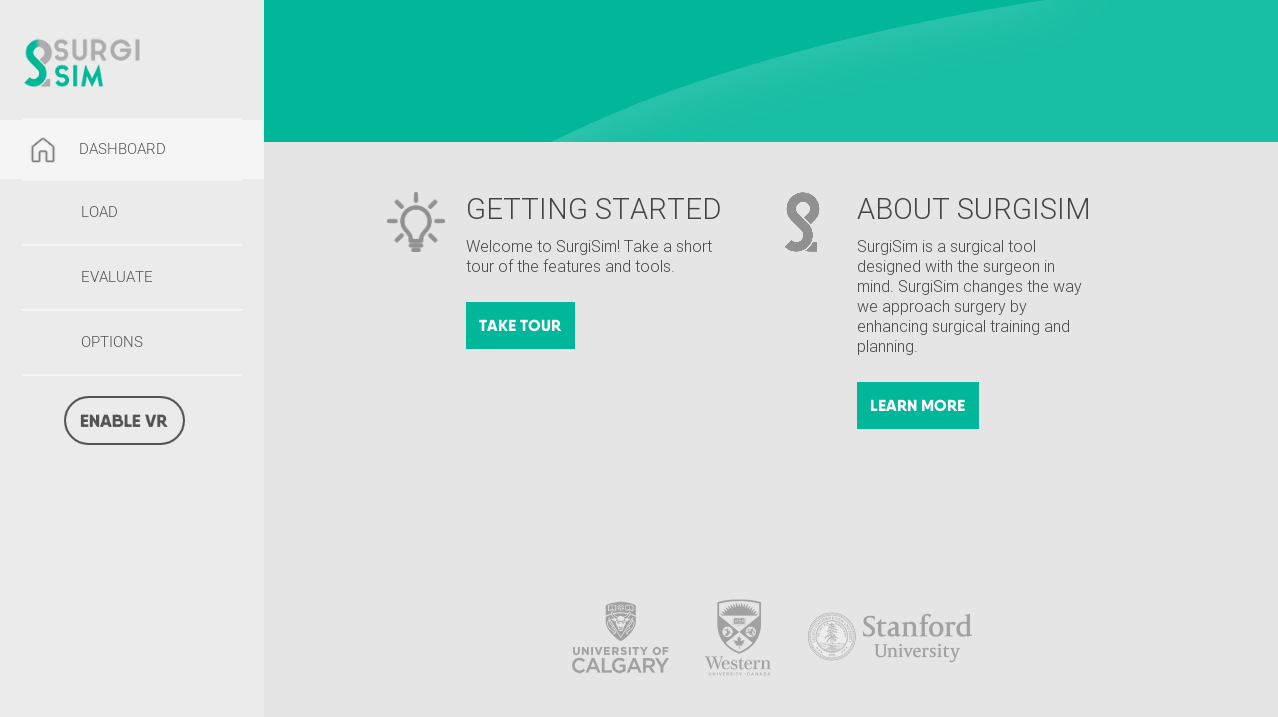
SurgiSim Dashboard
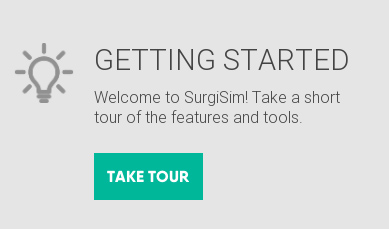
SurgiSim Tour
Haptic Device Setup
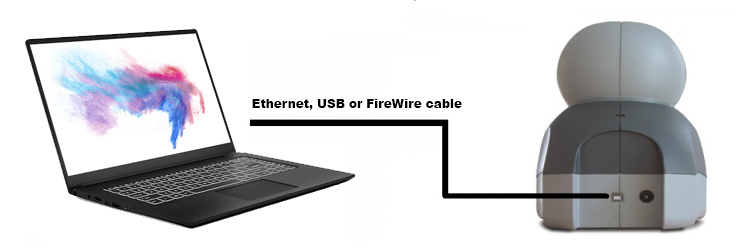
- Ensure power is on and your haptic device is connected to the computer (ethernet, USB, FireWire).
- Select Geomagic Touch Setup and follow on-screen prompts for establishing a connection with your haptic device. If you do not see your device after the setup is complete, click the “Rescan” button on the bottom-left of the screen.
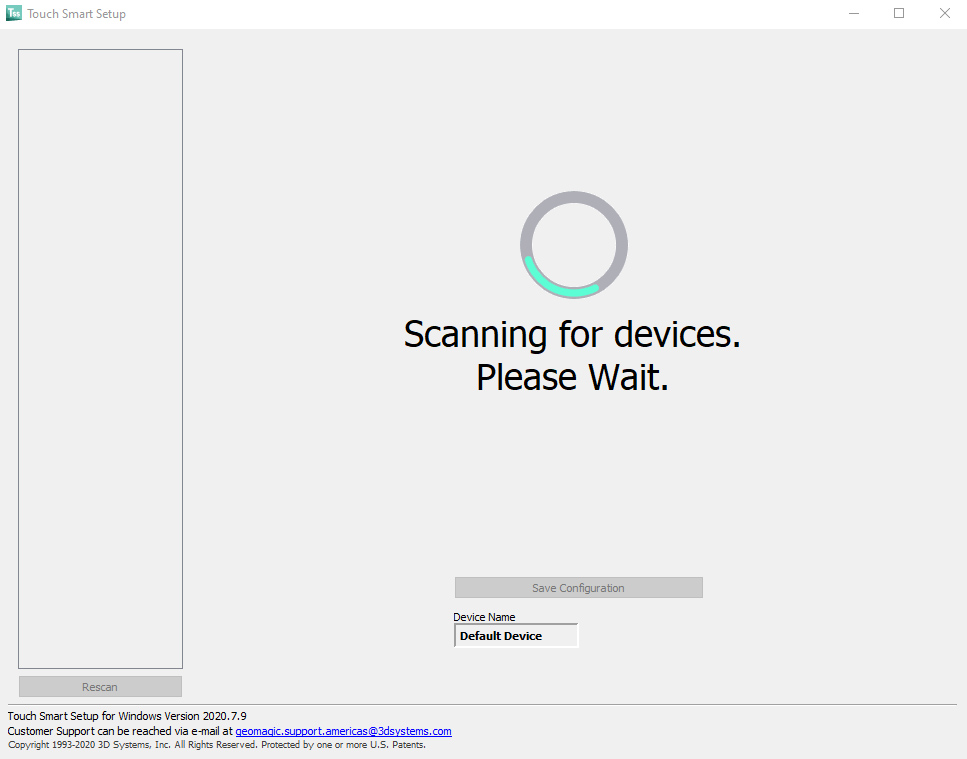
Touch Smart Setup
- Note, if you’re finding the device is not being identified, please uninstall the v2020.7.9 drivers and opt for the v2018.10.22 drivers instead.
- Select your haptic device, by clicking on the image on the left. You will then be prompted “press the button on the back of the device.” This small pairing button is located on the back right of the device.
- You will be prompted to insert the stylus into the inkwell to finalize calibration.
- To confirm that the device is working, feel free to use the “Sphere Simulation Test,” or the “Hollow Cube Simulation Test.”
- Once the haptic device is set-up, click the “Save Configuration” button located near the bottom of the screen. The Touch Smart Setup program will automatically close.
- Following the setup, Touch Smart Setup will close. You can now open the Diagnostics application to test the functionality of the haptic device with various tests including:
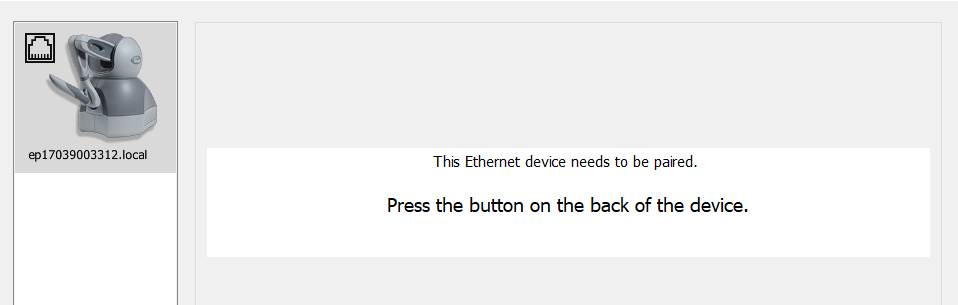
Pairing Haptic Device
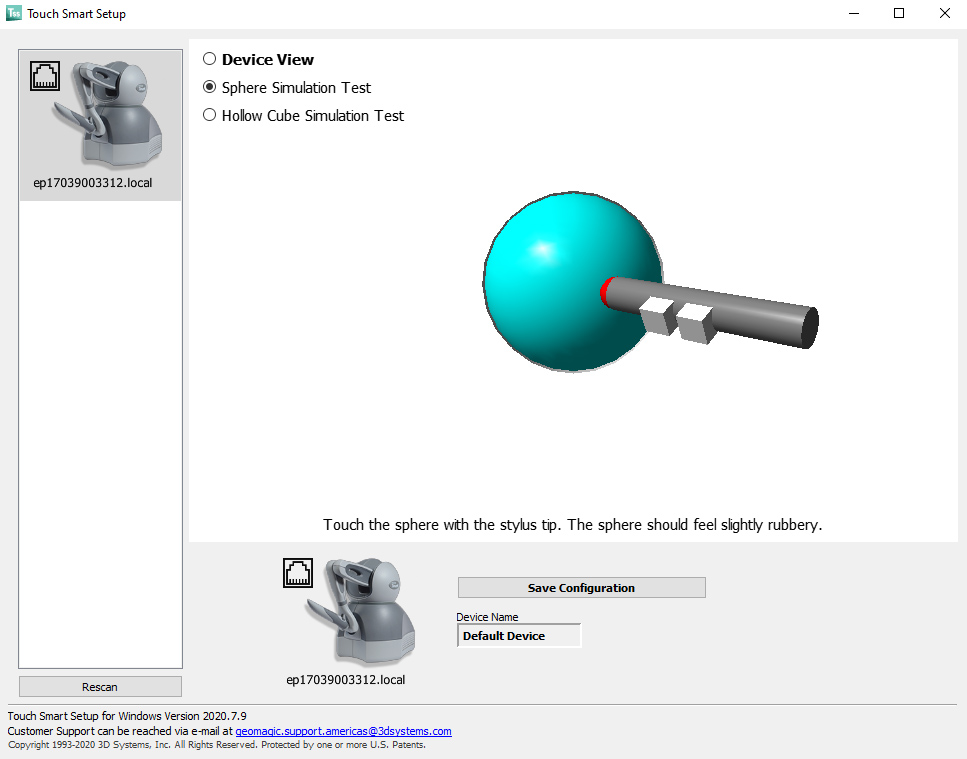
Sphere Simulation Test
For more information, see 3DSystems-Touch-UserGuide.pdf
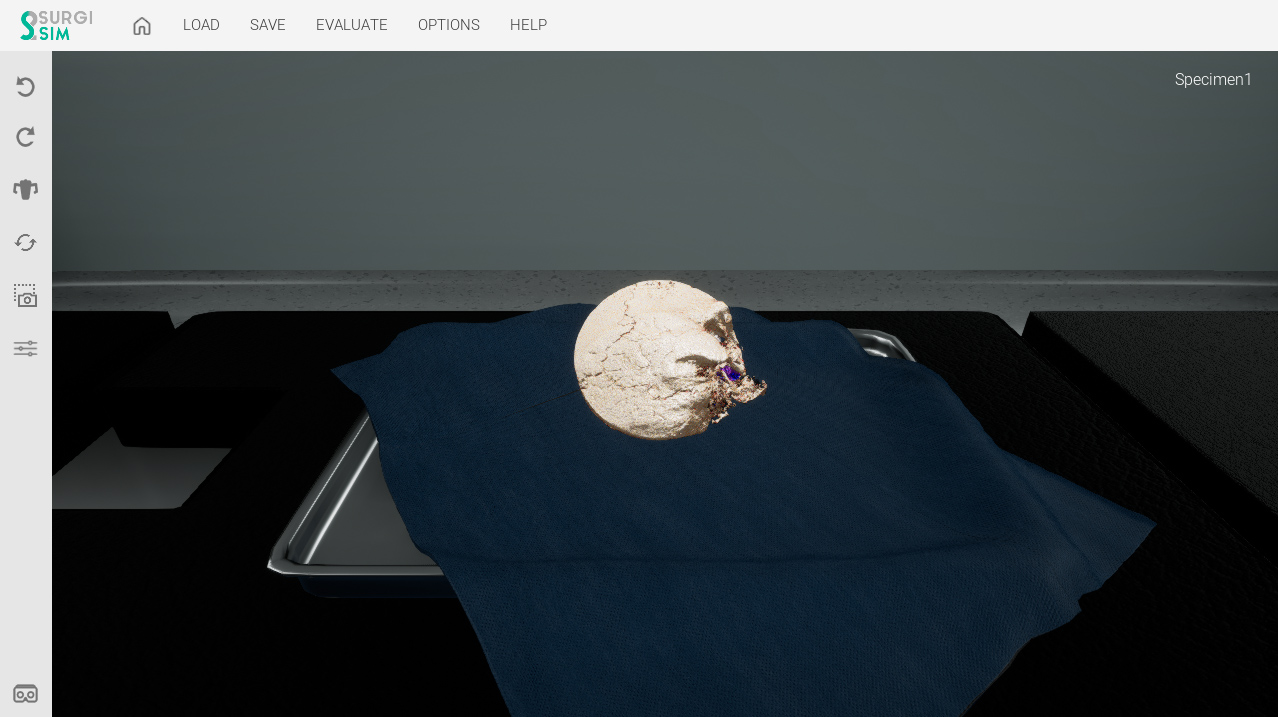
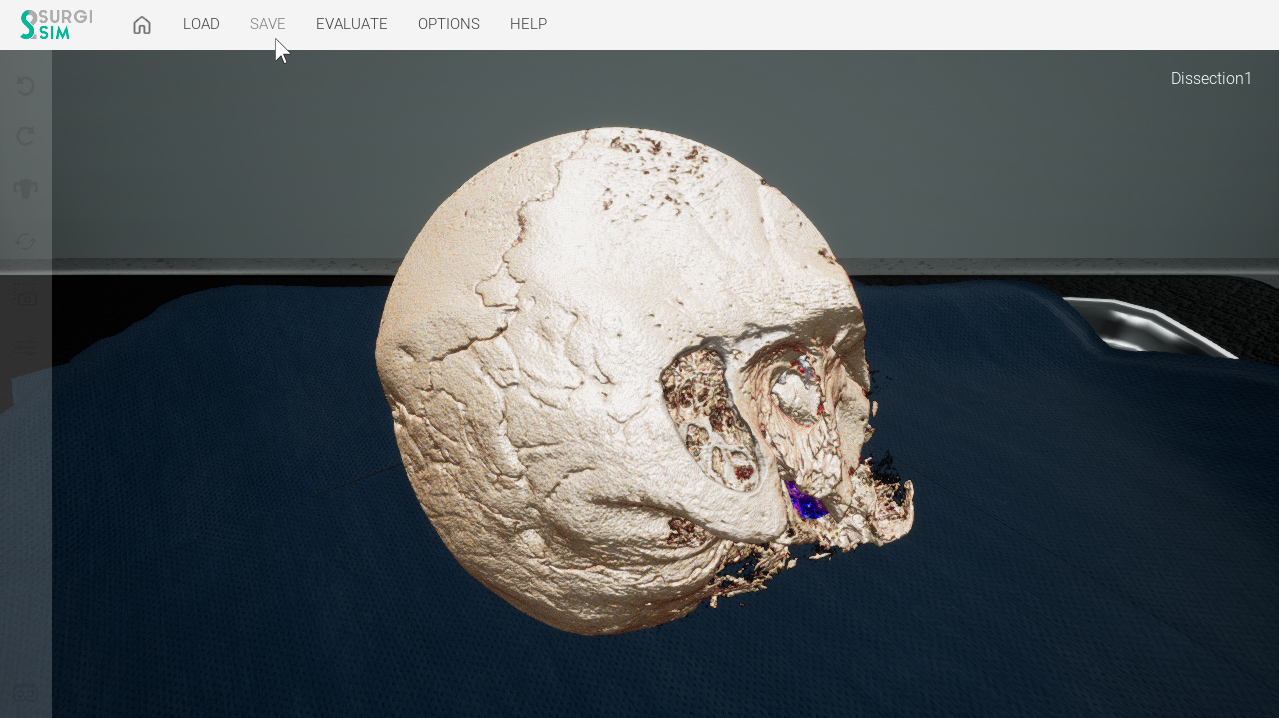
Monitor Mode / two-dimensional (2D)
- By default, SurgiSim will load in Monitor mode. In the future, there will be support for multiple 3D modes beyond head-mounted displays.
SurgiSim in Monitor mode
Loading Specimens
- Start SurgiSim;
- On your left, click "Load";
- Select a specimen and click "Load";
- Your specimen will start to load.
Currently, there are a series of pre-loaded specimens for you to dissect, save, and grade. In the future, you will be able to add specimens from your local hard drive or your shared cloud space.
In order to load specimens:
Start SurgiSim in Monitor Mode.
Click the "Load" option to view the specimens available in your local repository.
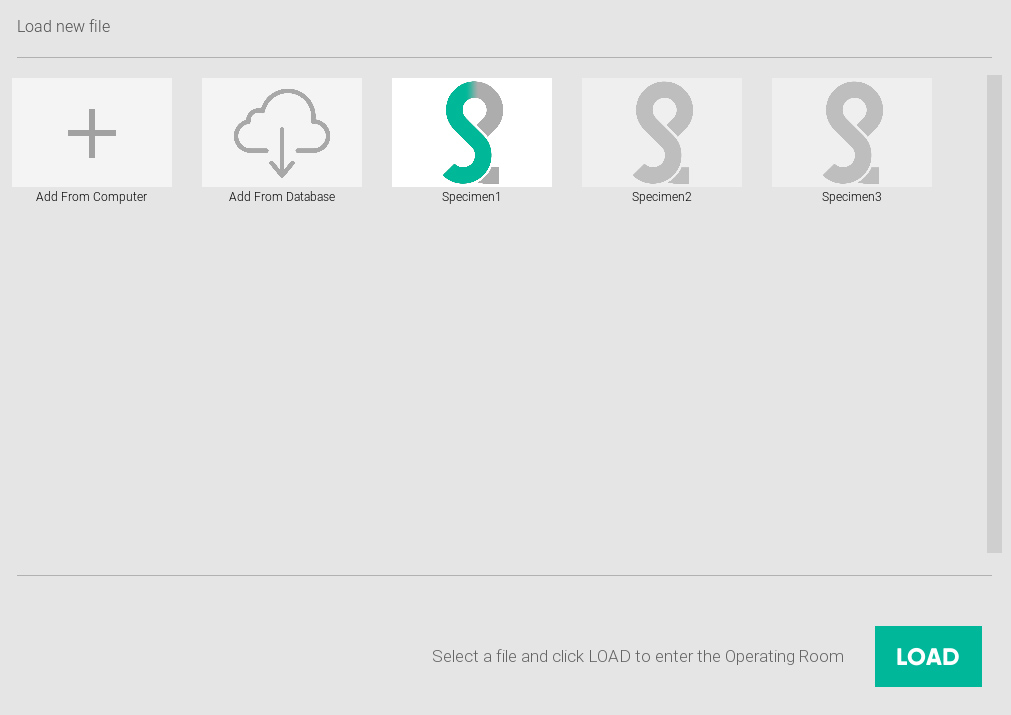
After you select a specimen, click load to enter the OR.
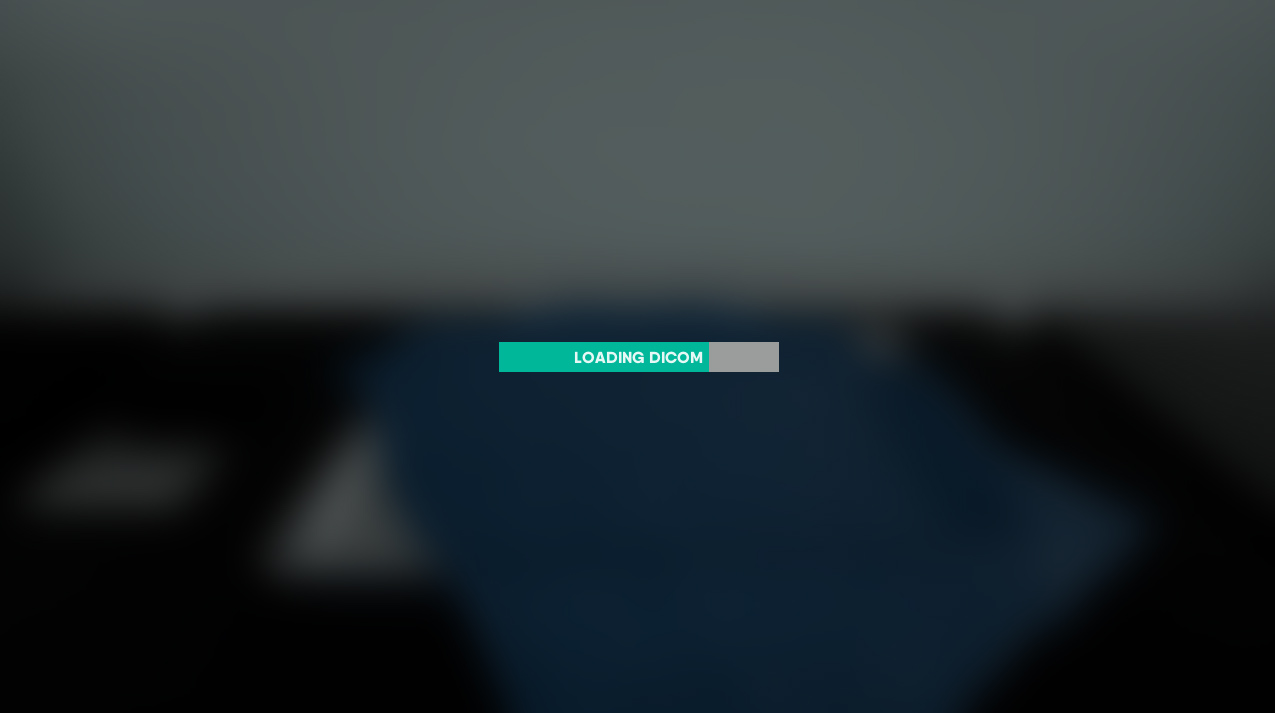
Loading Specimen's DICOM files and segmentations.
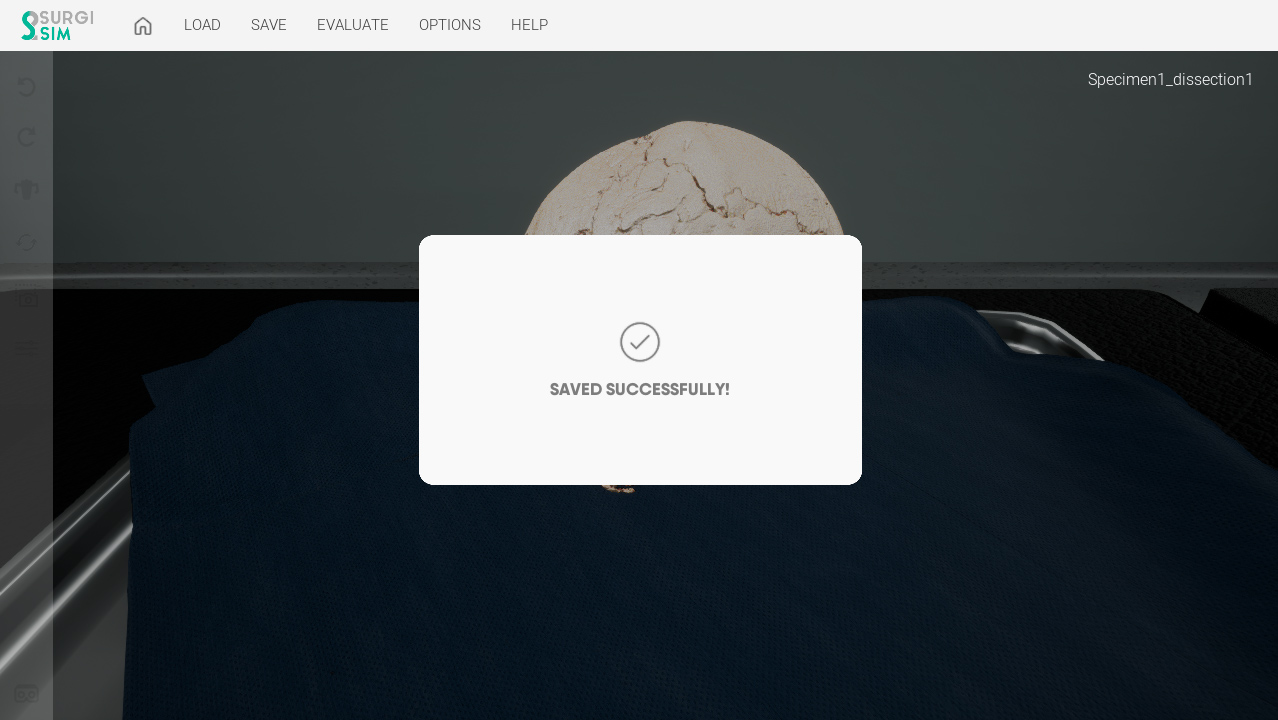
Saving Dissections
- When dissecting specimens, you have the ability to save dissections into different files. You can either overwrite the current specimen, or save it as a new one.
- By clicking save, you can return to your dissection at any time.
- Feel free to rename the dissection file so you can easily identify it next time.
Saving Dissections.
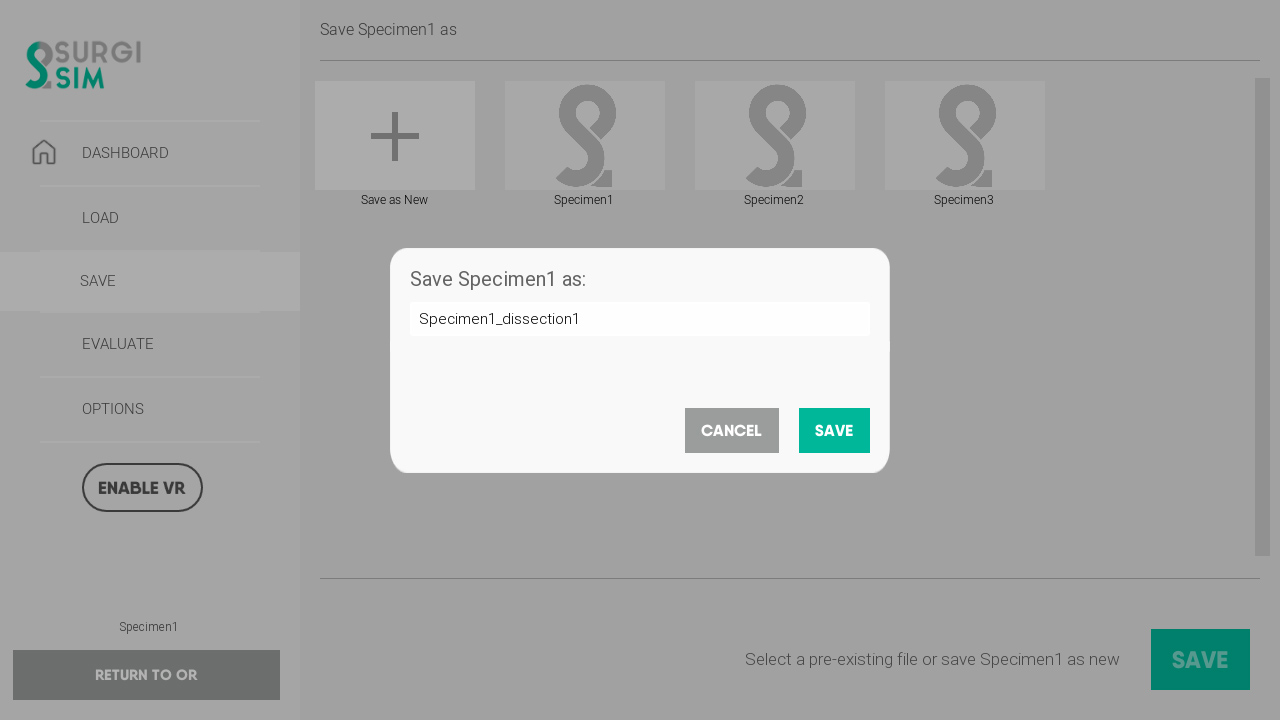
Saving Dissections.
Saving Dissections.
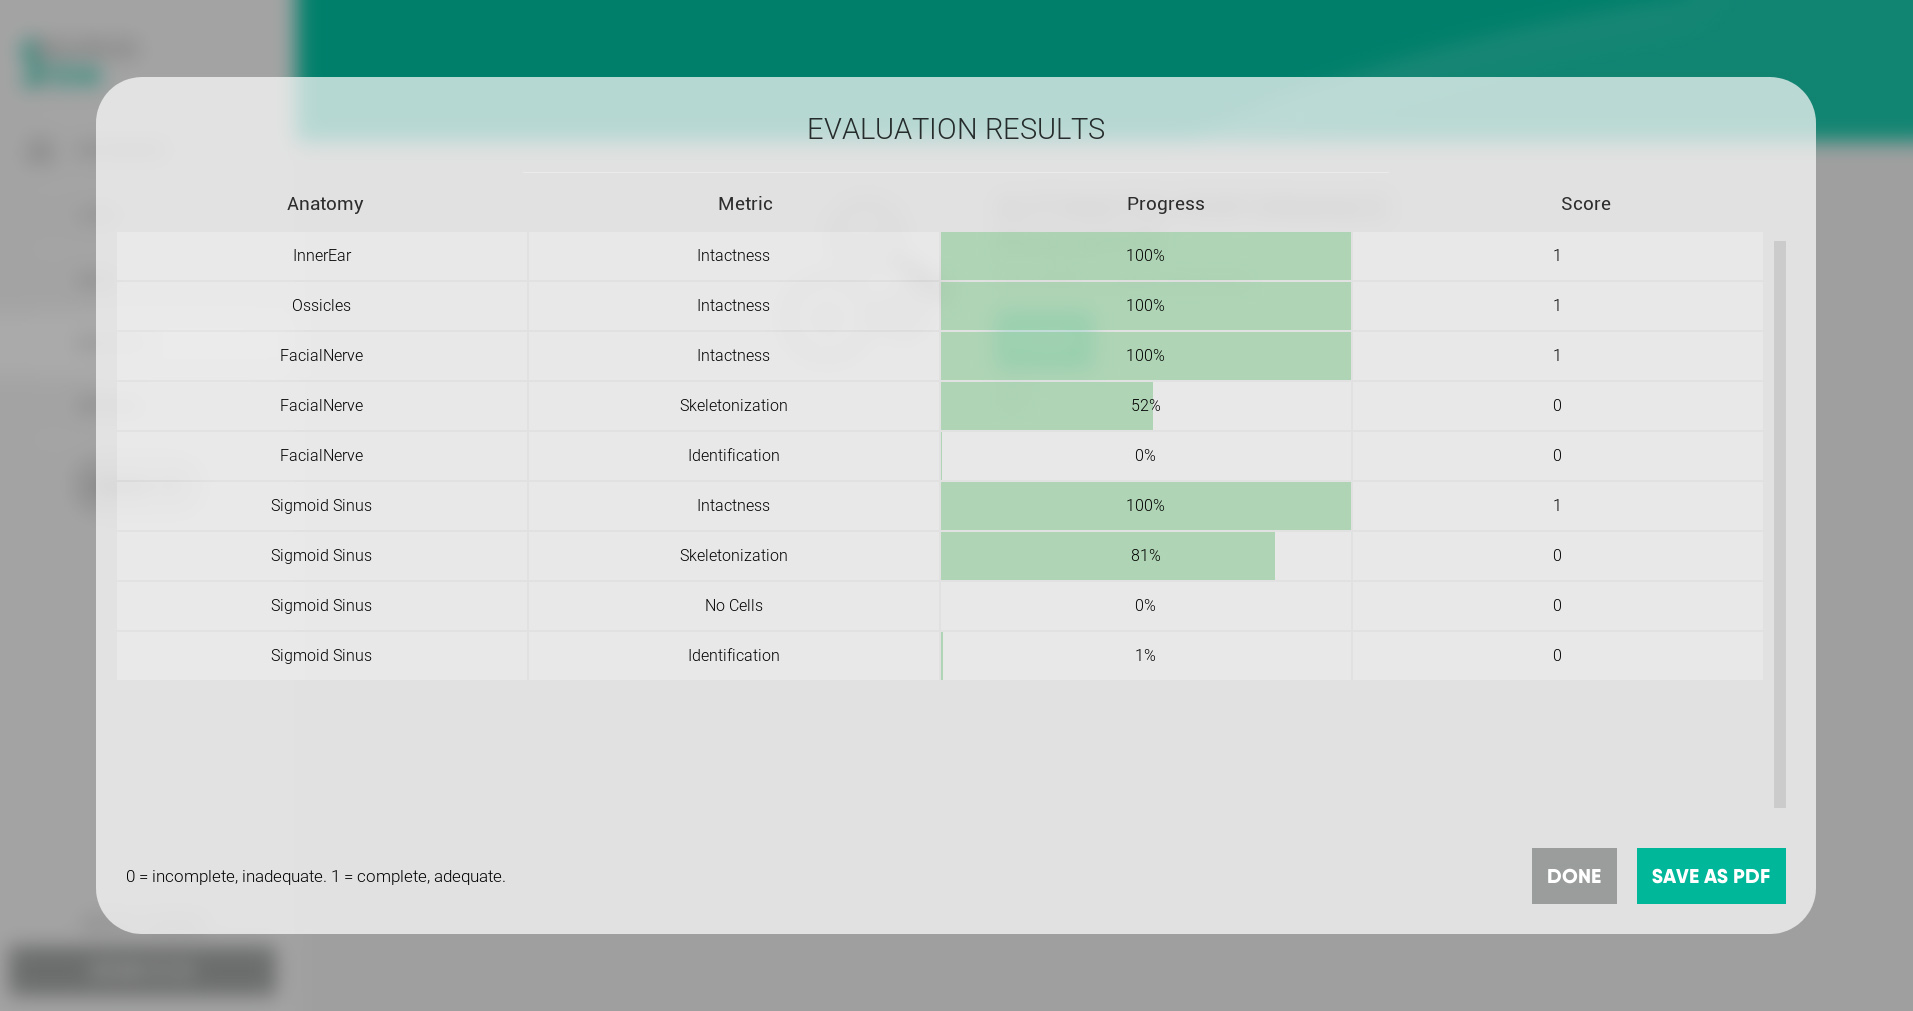
Evaluating Dissections
- With any dissected specimen, you can begin evaluation by clicking the “Evaluate” button located at the top of your screen.
- Please allow several minutes for the evaluation process to complete.
- At this time, evaluations can only be performed in monitor mode.
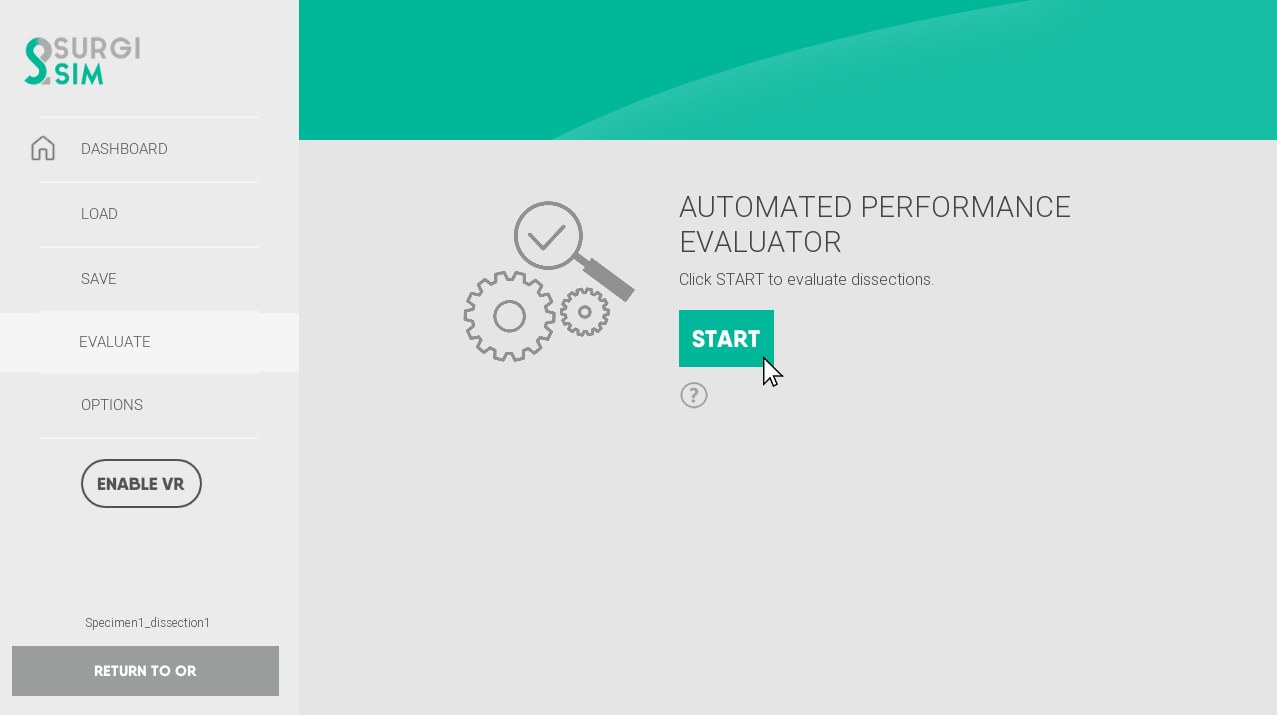
Click "START" to evaluate your dissection.
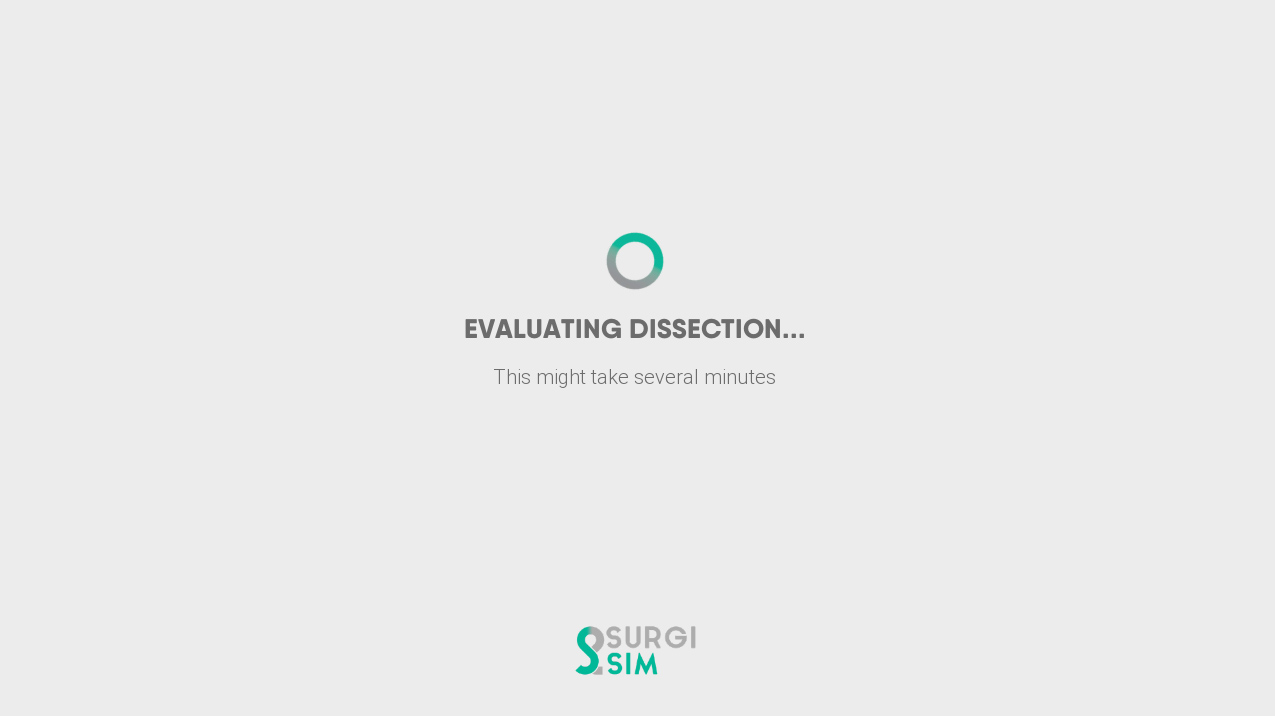
Evaluating.
Evaluation Results
Evaluating.
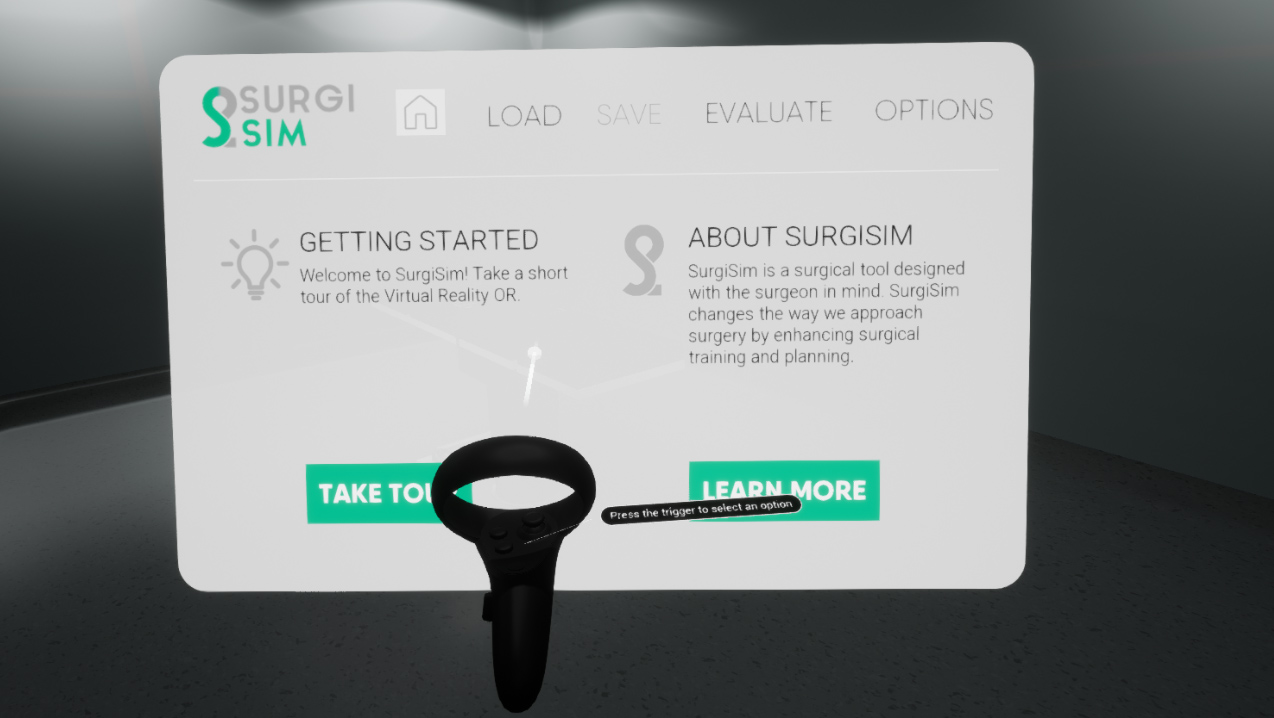
Virtual Reality (VR) Mode
- Ensure your Oculus headset is connected and working.
- Click Start in VR on your Home Page, or “Enable VR” on the left menu.
- You will see a VR menu similar to the monitor mode. You are also able to load specimens and save dissections using the virtual reality interface.
- Use your Oculus Touch Controllers to point at the menu. You will see a laser beam. Use the Trigger buttons to click, similar to using the left button on your mouse.
- If you wish to switch hands, press the trigger button. For instance: if the laser is attached to the right hand, press the trigger on the left.
VR dashboard.
Trigger buttons on the Oculus Touch Controllers.
Interacting with the menu in VR
Using the VR Microscope
- Use your hands to move the specimen under the microscope and manipulate it into your preferred orientation.
- Using one or both of the hand controllers, reach for the VR microscope handles to move the microscope. You will notice a small vibration when your hand is in proximity to the microscope’s handles.
- Tip: use your non-dominant hand to operate the Oculus controller. Your dominant hand will operate the haptic device.
- The realism of the VR microscope weight may require you to use both hands to maneuver it.
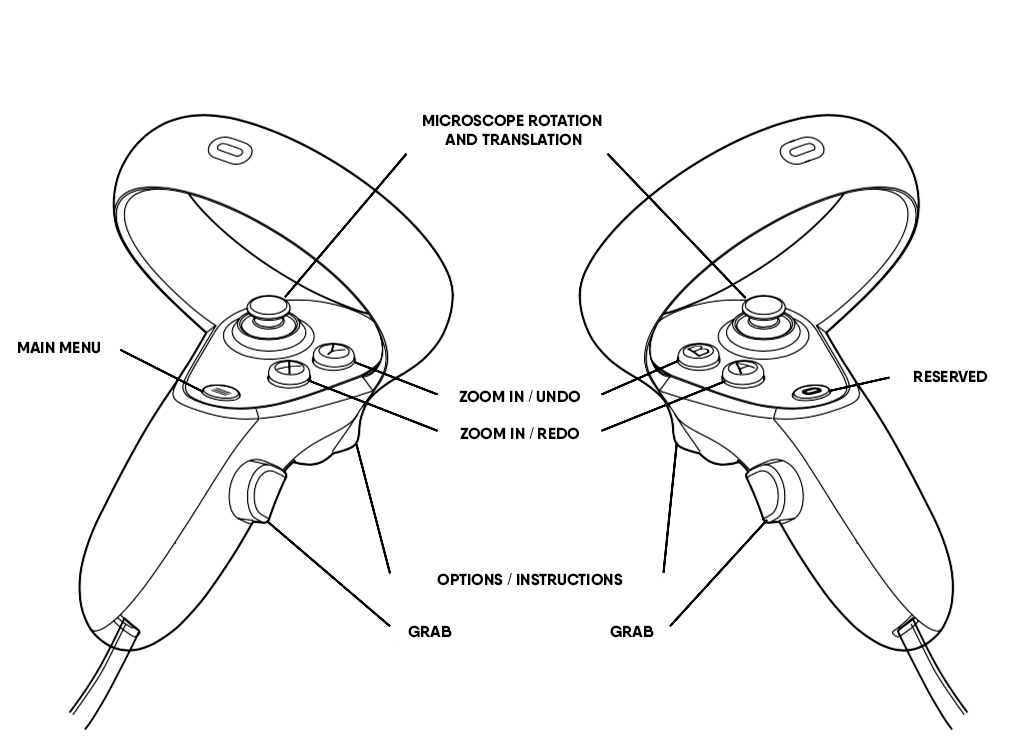
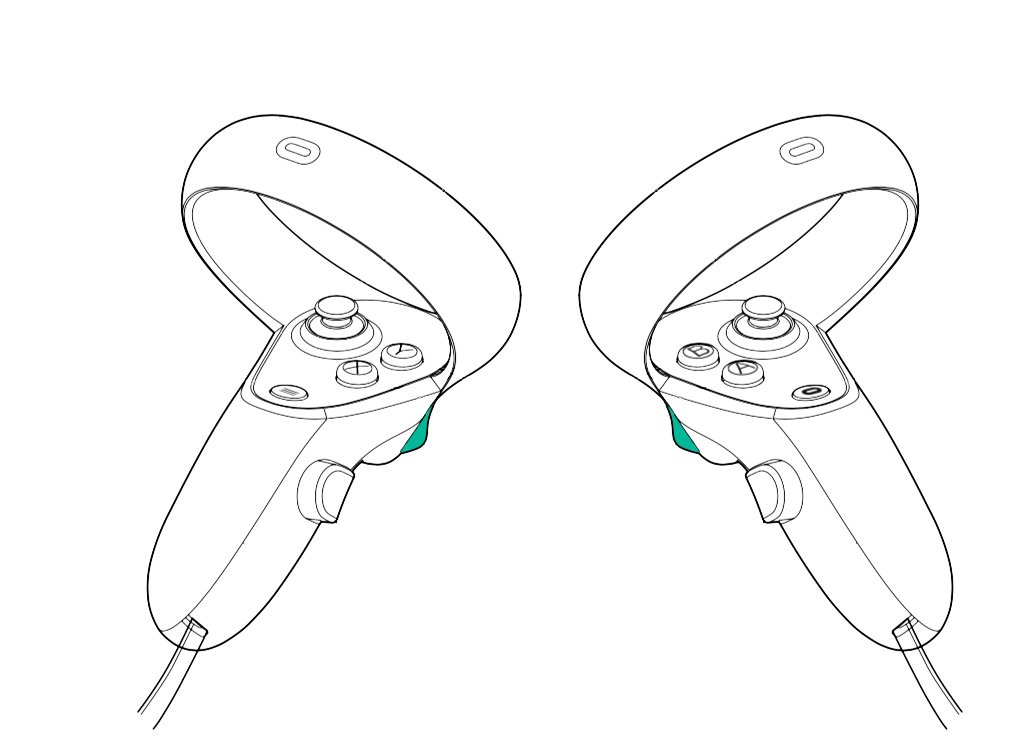
Oculus Touch Controllers' input mapping
Drilling in VR
- In both modes (Monitor and VR), the haptic device (once connected and operational) can be used immediately.
- There are two buttons on the haptic device. Pressing the lower button turns the drill on. Releasing the lower button will turn the drill off.
- Pressing the upper button will engage the drill clutch allowing you to move the stylus in a more comfortable position.
- If you are using a pedal, this will engage the drill as well.
- Positioning the haptic device closer to your dominant hand will improve ergonomics and ease of use.
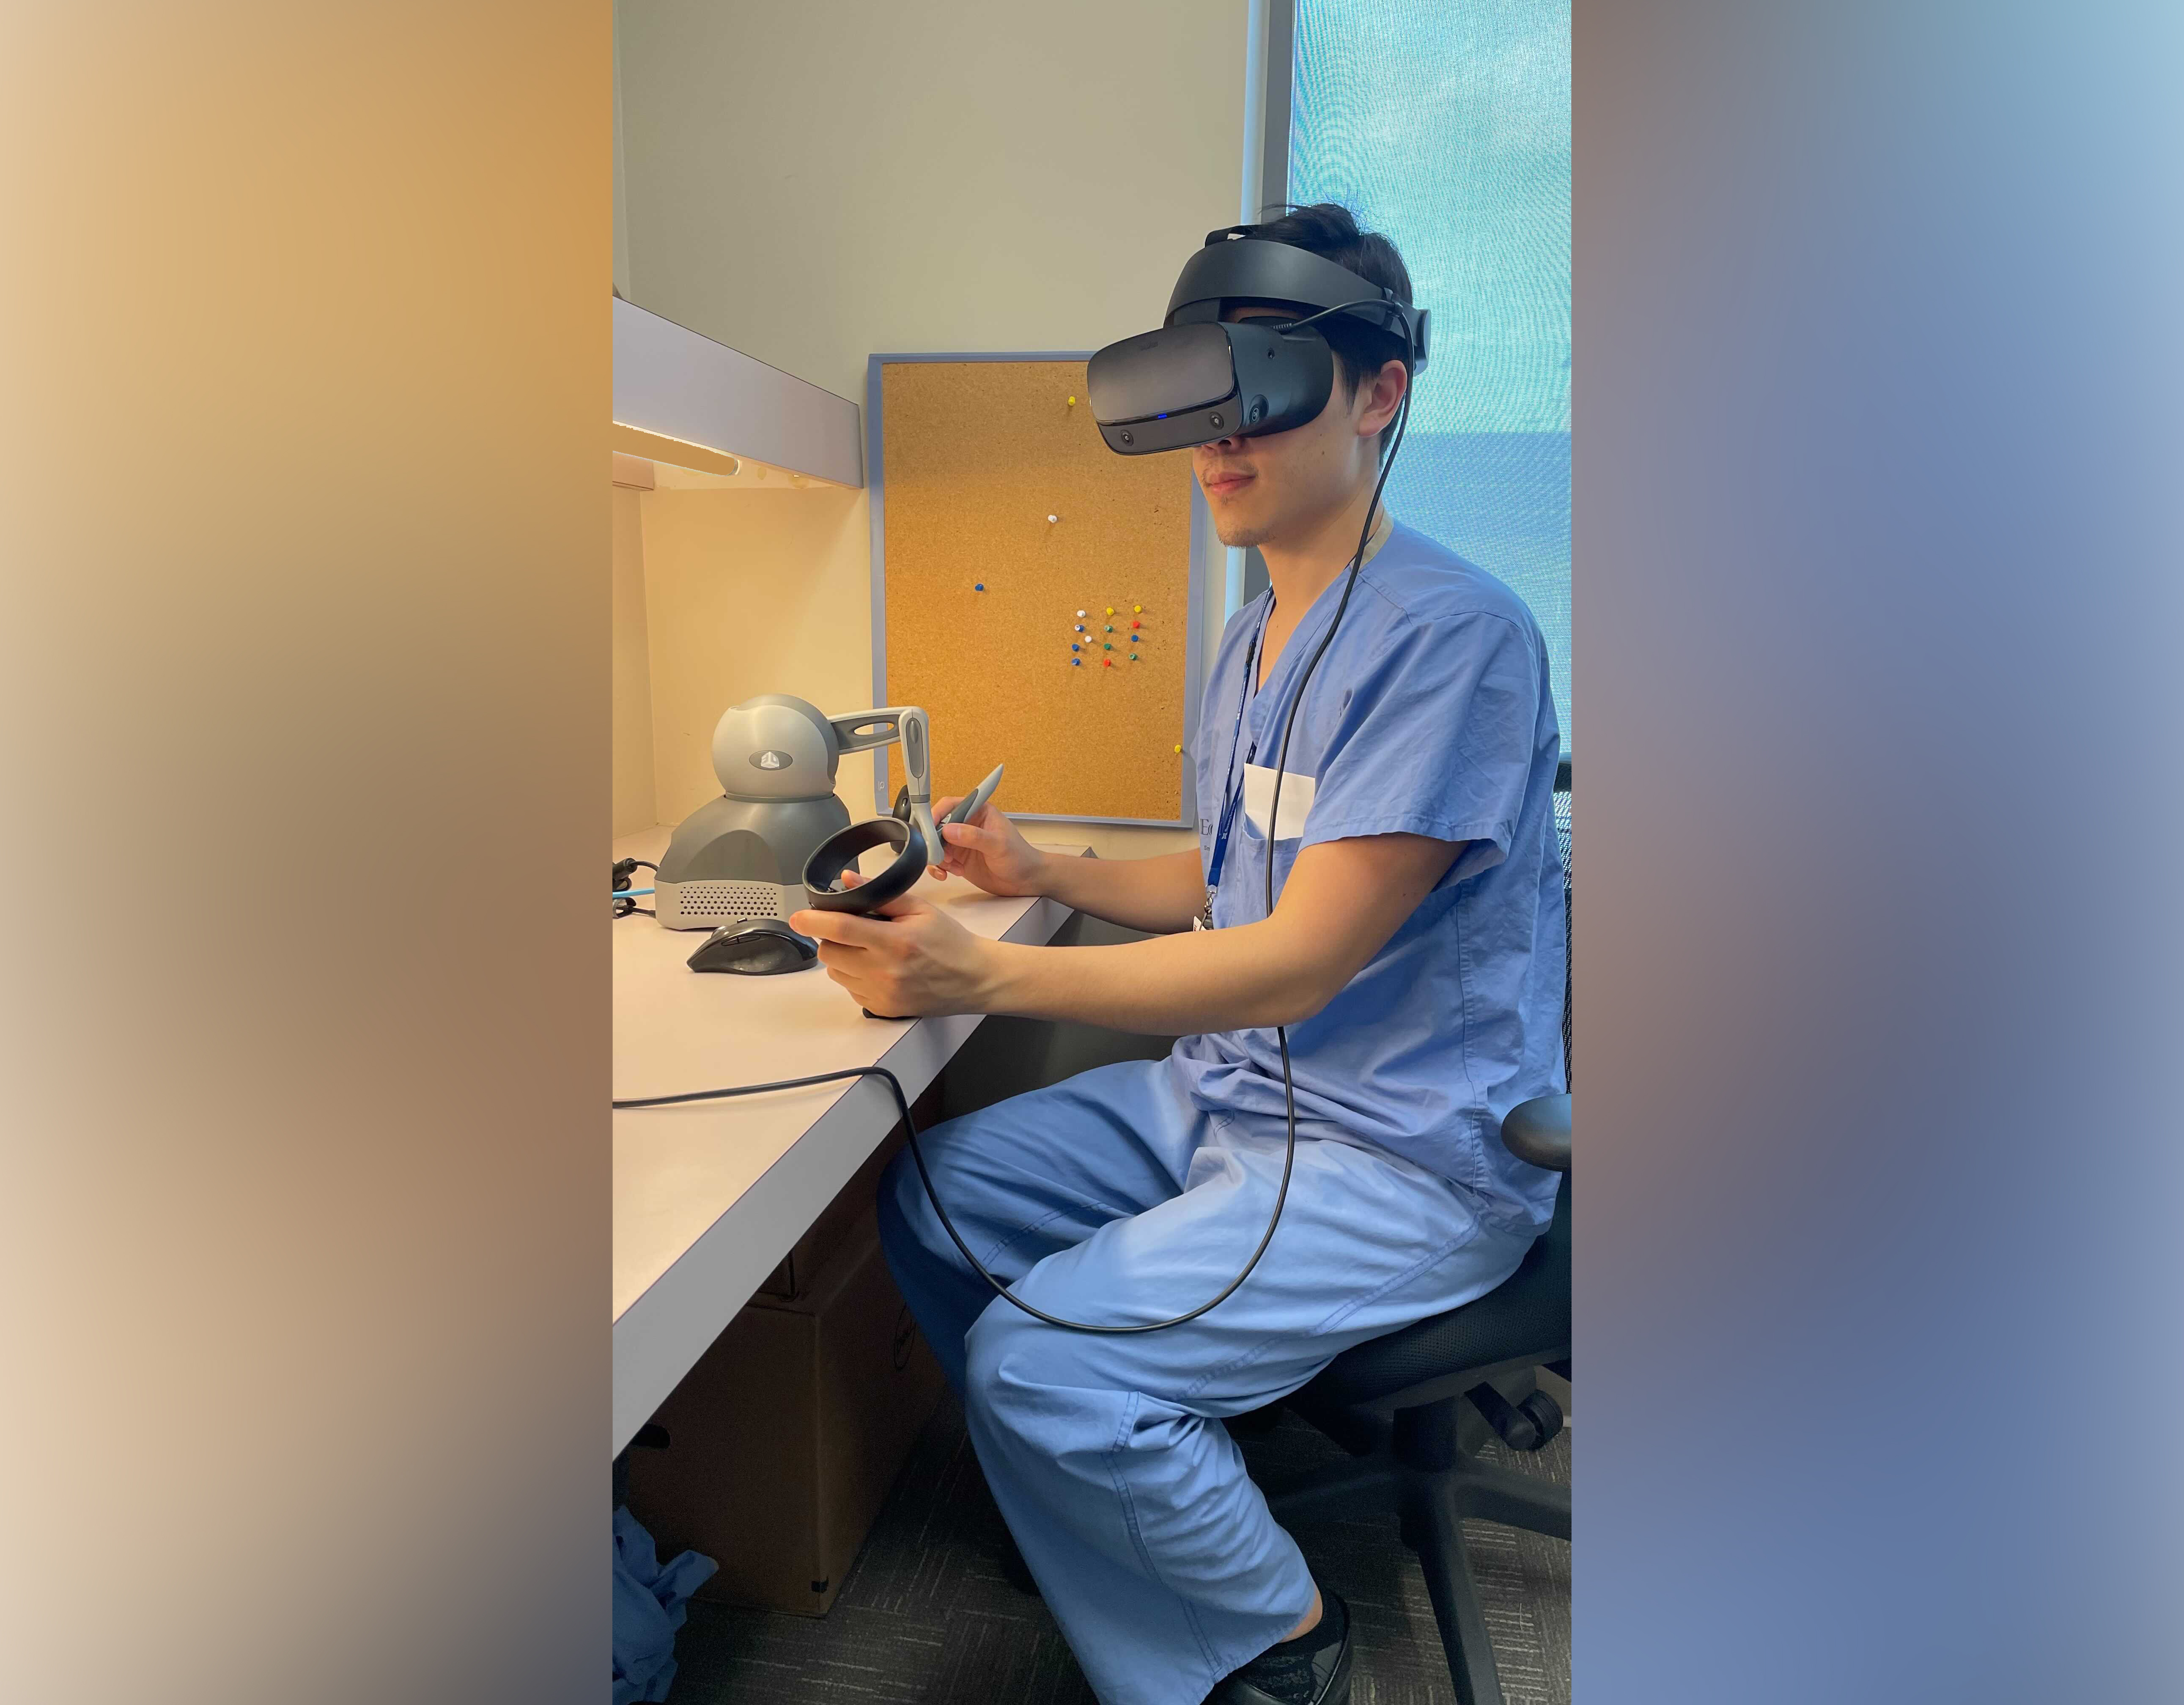
Using Haptics in VR mode
Troubleshooting (Common problems/errors)
Oculus headset not detected/not working
- Close SurgiSim;
- Ensure your headset is connected to your computer’s DisplayPort and USB port;
- If your headset is working properly, the Oculus home screen will be open;
- Ensure your drivers and the Oculus software are up-to-date.
- Please consult the Oculus support page for further troubleshooting: Oculus Support
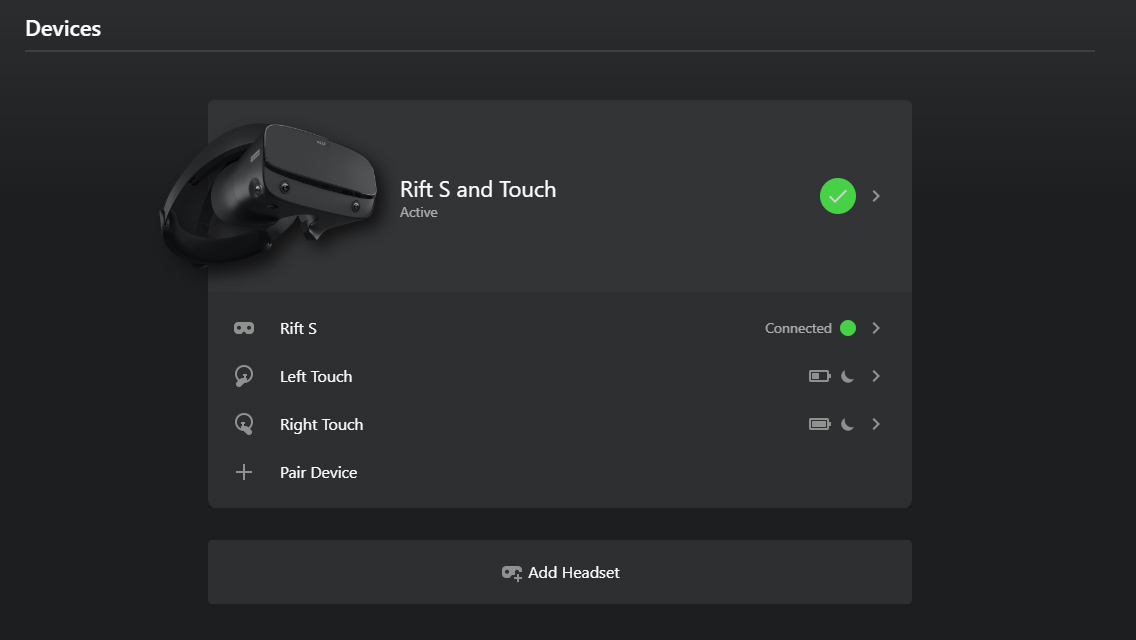
Oculus Rift S and Touch connected.
Oculus Home app
Haptic device not working
- Close SurgiSim;
- Ensure the haptic device is connected to your desktop via USB, ethernet, or FireWire. As well, ensure the haptic device has power connected;
- Open the Touch Smart Setup application located in your Program Files folder or desktop. If your device is not detected you will see the following screen:
- “No haptic devices found. Check all connections and select the “Rescan” button.”
- Prior to opening Touch Smart Setup, ensure all connections (power, USB/Ethernet/FireWire) are established.
- If you are still experiencing connectivity issues, we recommend restarting your computer;
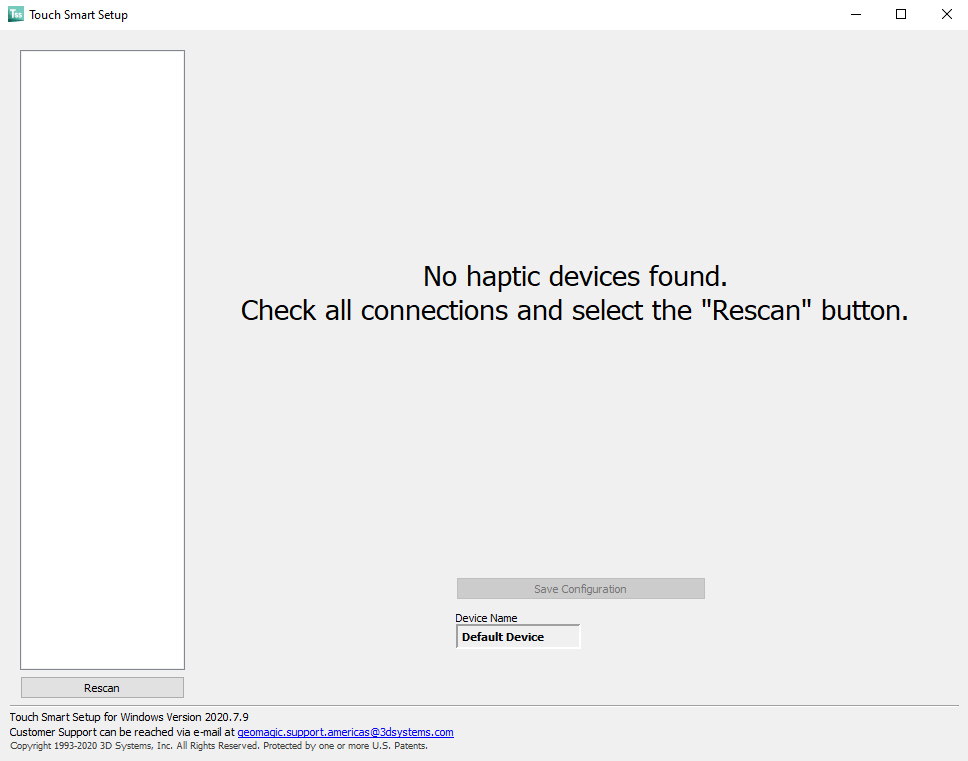
Click the "Rescan" button.